

Custom Fit Ford F150 XL XLT STX Pickup Seat Cover Manufacturer Guide to Materials and Fit
2026-11-17
Not all F-150 seat covers fit the way they claim. For XL, XLT, and STX owners, the difference between a factory-tight install and a sloppy cover often comes down to materials, foam backing, and pattern accuracy. Red Rain put together this materials-and-fit walkthrough so you can spot what actually holds up in a working truck—before you order.
What Actually Changes Between the XL, XLT, and STX Seat Frames
The steel frame underneath the XL, XLT, and STX seats is largely the same stamping. Ford does not build three entirely different seat structures for these trims; the mounting points, track spacing, and base pan carry over. What changes is mostly the padding shape and the hardware bolted to that shared frame.
On the XLT, you are more likely to get additional brackets for power recline or lumbar support, and the cushion foam is cut with a slightly deeper bolster profile. STX keeps the XL foundation but adds a sport cloth cover and firmer foam, so the difference you feel comes from the material stack, not from a redesigned seat frame.
In practice, this means cushions and covers can often be swapped between the trims if the adjustment hardware matches. The frame itself is not the real upgrade path; the change is in the foam density, cover pattern, and whether the adjuster assemblies are manual or powered.
Fabric Choices That Survive Mud, Tools, and Drive-Thru Spills
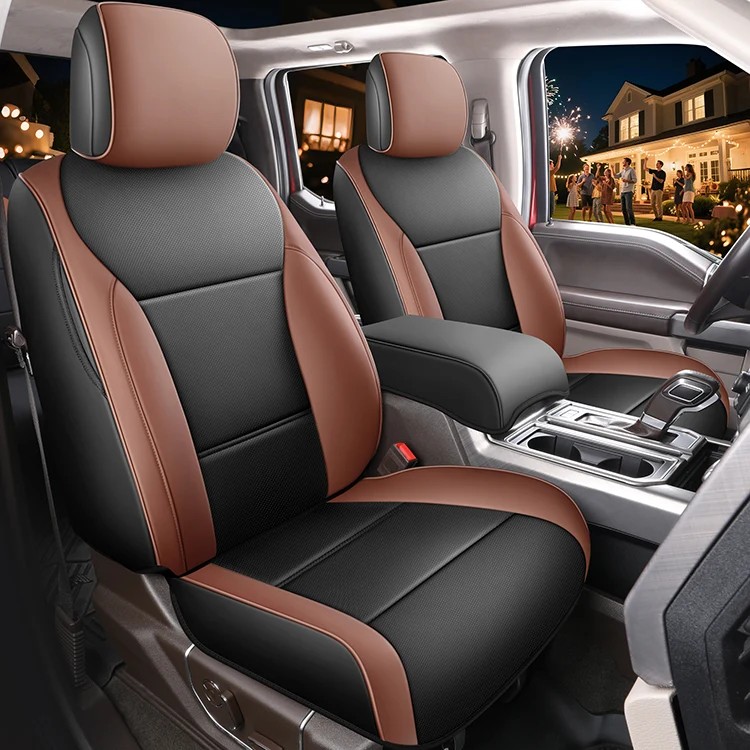
Thin woven upholstery looks great on the lot but gives up quickly once a damp dog climbs in or a toolbox slides across the seat. For daily abuse, choose a solution-dyed polyester or a tight nylon blend. These synthetics dry fast, resist water, and do not trap dried mud the way brushed knits do. A crushed ketchup packet or spilled soda usually lifts with a damp cloth before it turns into a permanent stain.
Vinyl and leatherette have improved enough that they no longer feel like sticky plastic on a hot afternoon. A good marine-grade vinyl shrugs off grease, coffee, and the occasional drill bit or nail that would snag woven fabric. If you want a softer feel, look for coated canvas or heavy duck cloth with a stain treatment. Avoid open-weave cloth and pale looped textures, because they collect crumbs and mud like a magnet.
Pay attention to how the material handles a wet wipe, not just how it looks new. Seams matter more than the tag: double-stitched edges and protected zippers stop grit from reaching the foam underneath. A darker heathered tone hides drive-thru aftermath better than solid black, which tends to show salt and sauce more than you would expect.
Foam Backing and Stretch Panels That Remove the Wrinkles
The foam backing handles the kind of creasing that normally shows up after a few wears. It gives the upper enough structure to avoid collapsing into sharp folds, but the material still moves with your foot instead of working against it. That slight resistance is enough to keep the surface from bunching in the same spot every time you step.
The stretch panels are placed where the foot flexes most, so the fabric spreads tension instead of folding along one hard line. Rather than fighting the motion, the panels let the upper roll through each stride and then settle back into shape. By the time the shoe comes off, most of the shallow lines have already smoothed out on their own.
It is a quieter approach than adding heavy reinforcement or plastic overlays. The materials do the work through flexibility, not stiffness, which keeps the shoe feeling broken in without looking worn out.
Mapping Airbag Seams, Latch Points, and Split Bench Clearances
Locating the airbag seam on a seat back usually starts with following the stitch line that breaks away from the main bolster pattern. The thread spacing often tightens near the deployment zone, and on some trims a small fabric flag or label is tucked just inside the side panel. Rather than relying on a shop manual illustration, flex the outer bolster slightly and watch for a seam that opens less evenly than the surrounding upholstery. Mark it with a non-magnetic pen before any trim removal so the tear path stays obvious.
Latch points need to be measured from the base of the striker, not from the outer edge of the plastic escutcheon around it. Worn strikers and tired slide tracks can shift a reading by several millimeters, which matters more on a split bench than on a single bucket. Move the seat to the middle of its track, clear any debris from the rails, and then take both side-to-side and fore-aft measurements. If the bench shares a center anchor, compare each side independently because the two sections rarely sit at identical heights once the cushions settle.
Split bench clearances change the moment a backrest is folded or a seat is flipped forward. The gap between adjacent backrests often tightens near the outer shoulder area, while the clearance against the wheel arch may open up slightly. On 60/40 splits in particular, the wider section tends to wander toward the door under hard braking, so record the gap with the seat both latched and unlatched. Pay extra attention around the headrest posts and armrests, since that is where an airbag deployment path is most likely to catch on a misaligned cushion.
Thread Tension and Seam Placement on High-Wear Bolsters
High-wear bolsters rarely fail because the fabric gives out first. More often, the stitching starts to degrade under repeated abrasion, and thread tension is usually the hidden trigger. When the top tension is pulled too tight, the thread can act like a fine saw against the fabric backing and foam, especially on dense foams or laminated upholstery materials. Over time, that creates a weak groove along the stitch line and the seam opens from the inside. If the tension is too loose, loops remain on the underside where hands, elbows, or hips catch them. The safest approach is to test on the actual stack of layers you will sew, not on a single fabric scrap, and adjust until the knot sits buried in the middle of the seam. Let up on speed around the rounded bolster ends where thickness changes abruptly, since that is where tension tends to spike.
Seam placement on a high-wear bolster should follow the contact pattern, not just the easiest sewing path. A long cylindrical bolster will usually be gripped at the ends or pressed along the center, so placing a prominent seam directly on the top curve or around the front edge gives friction a predictable line to attack. Move primary structural seams to the underside or the back face, where contact is lighter, and keep decorative seams away from areas that take direct pressure. If a seam has to sit near a high-wear zone, rolling it inward slightly or setting it back from the crown can reduce direct abrasion. Adding a welt cord or piping also shifts the wear point onto the cord rather than the main stitch line.
Before assembly, mark the pinch and pressure points on the foam shell and plan seams away from those marks. When a seam cannot be moved, reinforce the seam allowance with a low-stretch tape or use a double-stitched construction so the load is spread across two lines instead of one. Shorten the stitch length slightly in high-wear areas, around 2.5 to 3 millimeters, and lock the seam ends firmly with a back tack. On the first piece, turn the cover inside out and inspect the intersection of the needle and bobbin threads. If the knot is visible on either surface, adjust the tension before running the rest of the batch rather than forcing the seam to behave later.
Testing Fit With Real Seats, Not Just CAD Files
A CAD model can tell you if the seat geometry clears the B-pillar and whether the mounting holes line up, but it will never tell you how the cushion feels after forty minutes in traffic. We use pre-production seat samples mounted in a body-in-white or a simple rig, and we have people of different builds climb in and out, adjust the backrest, and sit for long stretches. Notes get taken on pressure across the thighs, the edge of the bolster digging into a hip, or a lumbar curve sitting too flat against the lower back.
The loop is deliberately low-tech. A tester slides the seat forward and back, changes the recline angle, and then drives the route with more potholes than smooth pavement. Afterward, we ask about fatigue and any hard spots under the foam. Sometimes the issue is not the seat at all, but the relationship between the seat and the door armrest, or the way the headliner crowds the helmet. Those interactions never show up cleanly in a digital assembly.
When a complaint repeats across several body types, the seat comes apart. We change foam density, trim a plastic shell edge, or shift a seam forward half an inch, then build another sample and test again. It is slower than clicking through renderings, but it catches the kind of discomfort that customers only discover after signing the paperwork.
FAQ
It means the pattern follows the exact seat shape for those trims, including cutouts for the seat belt buckles, headrest posts, fold-down armrest where present, and relief areas for seat-mounted airbags. The covers should hug the bolsters rather than hang loose.
Neoprene is hard to beat for water and stain resistance, while heavy canvas or duck weave handles abrasion from tools and boots. Leatherette looks cleaner but can feel hot. A breathable center panel helps if the truck lacks cooled seats.
No. You need to match the cover to the seating layout. XL trucks often have a 40/20/40 bench, while XLT and STX can come with buckets and a console or a bench. Check whether the lower cushion is split, whether the center seat has a fold-down back, and whether the armrest is built into the seat.
Most of them can. You start by slipping the backrest cover over the top and working it down, then fit the bottom cushion cover and secure the straps underneath. It takes patience in a regular cab because space is tight, but seat removal is not usually required.
The covers need to have a breakaway design or an airbag-safe label. The stitching or a dedicated flap is positioned to tear open along the same path as the factory seat seam so the bag can deploy without the cover blocking it. Avoid standard slipcovers that wrap over the airbag module.
Many kits include a zippered or hook-and-loop opening for the armrest and leave the underseat area accessible. If the rear seat has a storage tray, the cover should not extend so far under the seat that it blocks the latch.
A combination of elastic edges, adjustable straps, buckles, and sometimes hook-and-loop strips or chucks that tuck into the seat crease. The bottom cushion straps should be run under the seat and cinched tight, not just left hanging.
Most fabric covers can be lightly scrubbed with warm water and mild soap, then air-dried. Neoprene can handle a damp cloth wipe. Avoid harsh solvents and machine washing unless the label specifically allows it, because heat and agitation can break down the backing and fade the color.
Conclusion
The first thing worth knowing about the XL, XLT, and STX is that the seat frames are not interchangeable. The cushion pan depth, backrest angle, and the position of the split bench release can all vary enough that a cover cut from one seat will bind or wrinkle on another. For that reason, the patterns start with a physical seat survey instead of a single reference model. Foam backing is then graded across the panel, thicker on the side bolsters and softer under the legs, so the cover holds its shape without feeling stiff. Stretch panels are placed only where the fabric needs to move, mainly around the lower cushion corners and the upper backrest. Airbag seams are indexed to the original tear line, and the split bench clearance is checked at the latch, the hinge, and the fold point to keep the cover from catching when the seat is flipped up.
Fabric selection for a work-oriented F-150 has to account for mud, tools, and spills that happen on a regular basis. A tightly woven center face fabric handles the worst of the abrasion, while the side panels use a more flexible material so the cover follows the seat contour instead of pulling away at the edges. Thread tension gets more attention on the outer bolsters, where constant sliding during entry and exit creates the highest wear. On those seams, we shorten the stitch length slightly and reduce the top thread tension just enough to stop the seam from grinning open without making it weak. The final fit test is done on real seats from all three trims, not just a digital model. Each cover is installed, left under load, and then removed and reinstalled to check for shifting, creasing, or any spots where the pattern needs a small adjustment.
Contact Us
Contact Person: Ms. Zhu
Email: [email protected]
Tel/WhatsApp: 86-15906860931
Website: https://www.redrainseatcovers.com